Meet the Raspberry Pi
Let’s take a look at the Raspberry Pi. You should have a Raspberry Pi computer in front of you for this. It shouldn’t be connected to anything yet.
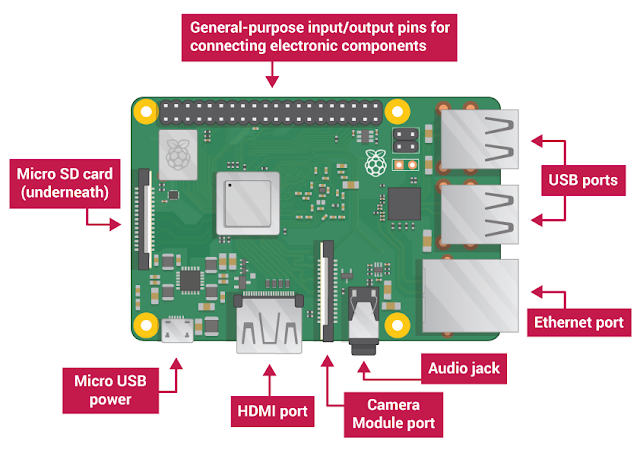
Look at your Raspberry Pi. Can you find all the things labelled on the diagram?
 |
| Introduction to Raspberry Pi Board |
USB ports — these are used to connect a mouse and keyboard. You can also connect other components, such as a USB drive.
SD card slot — you can slot the SD card in here. This is where the operating system software and your files are stored.
Ethernet port — this is used to connect the Raspberry Pi to a network with a cable. The Raspberry Pi can also connect to a network via wireless LAN (Wi-Fi).
Audio jack — you can connect headphones or speakers here.
HDMI port — this is where you connect the monitor (or projector) that you are using to display the output from the Raspberry Pi. If your monitor has speakers, you can also use them to hear sound.
Micro USB power connector — this is where you connect a power supply. You should always do this last, after you have connected all your other components.
GPIO ports — these allow you to connect electronic components such as LEDs and buttons to the Raspberry Pi.


No comments:
Post a Comment